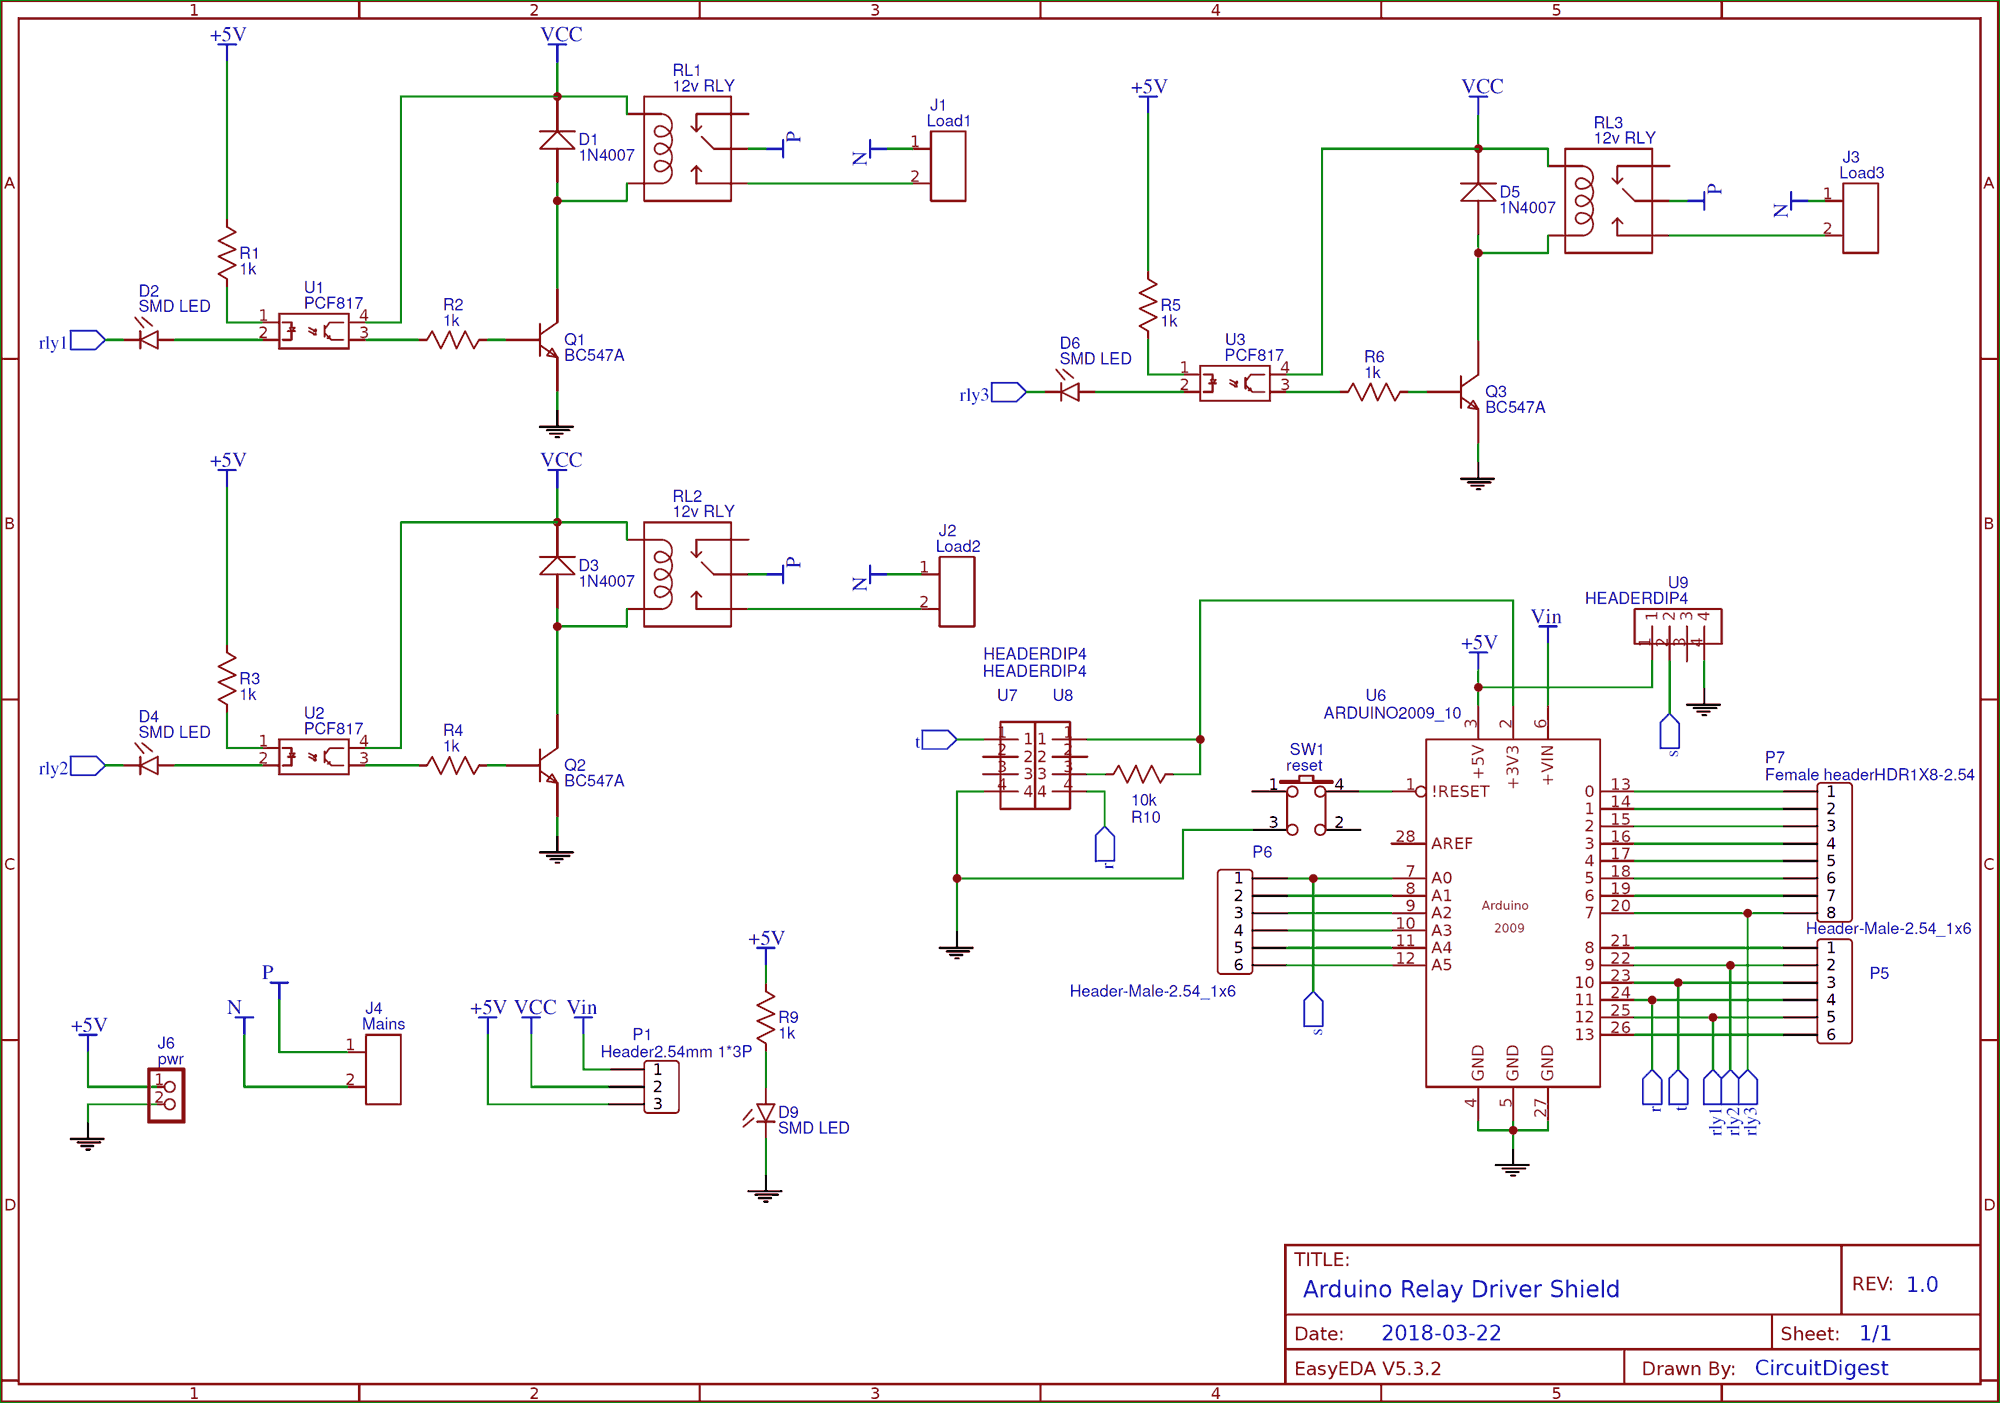
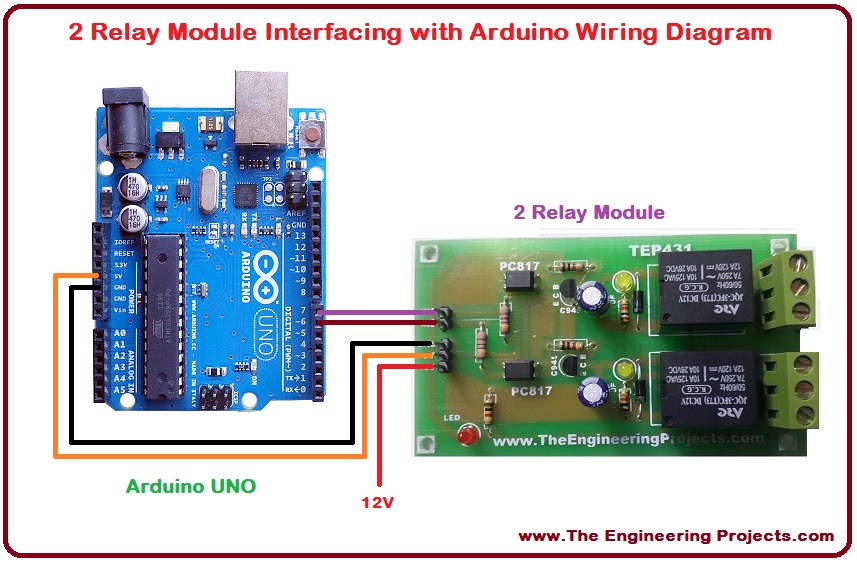
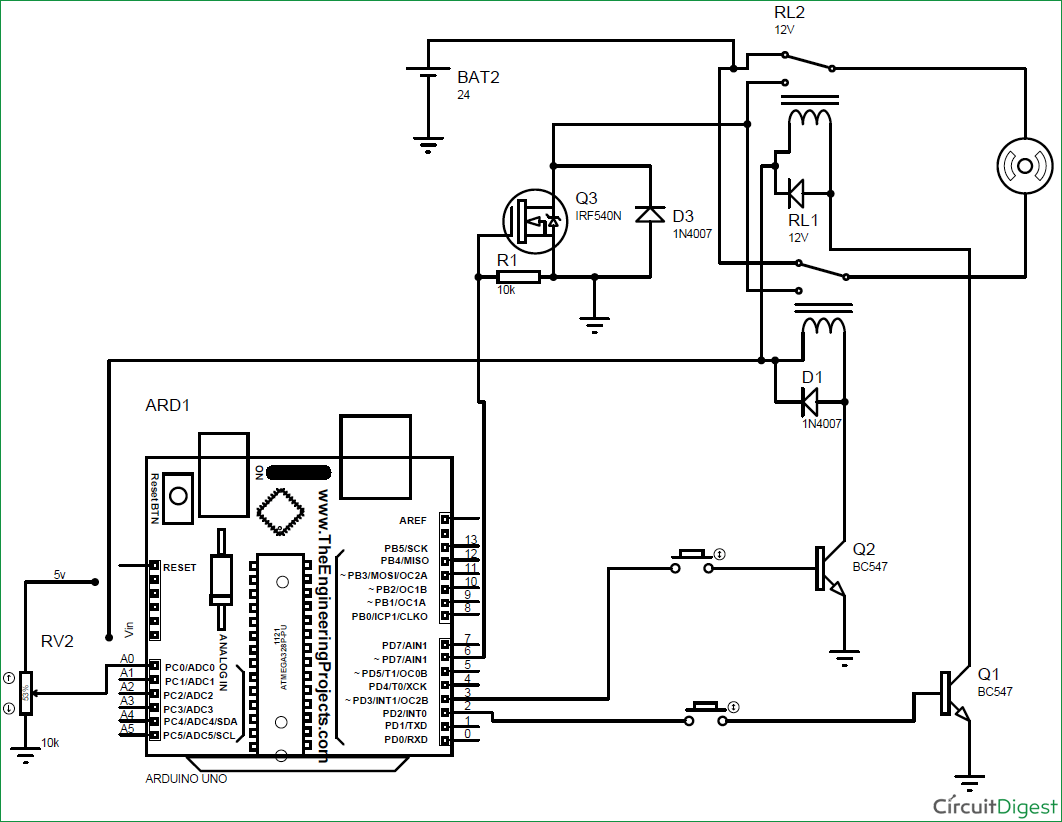
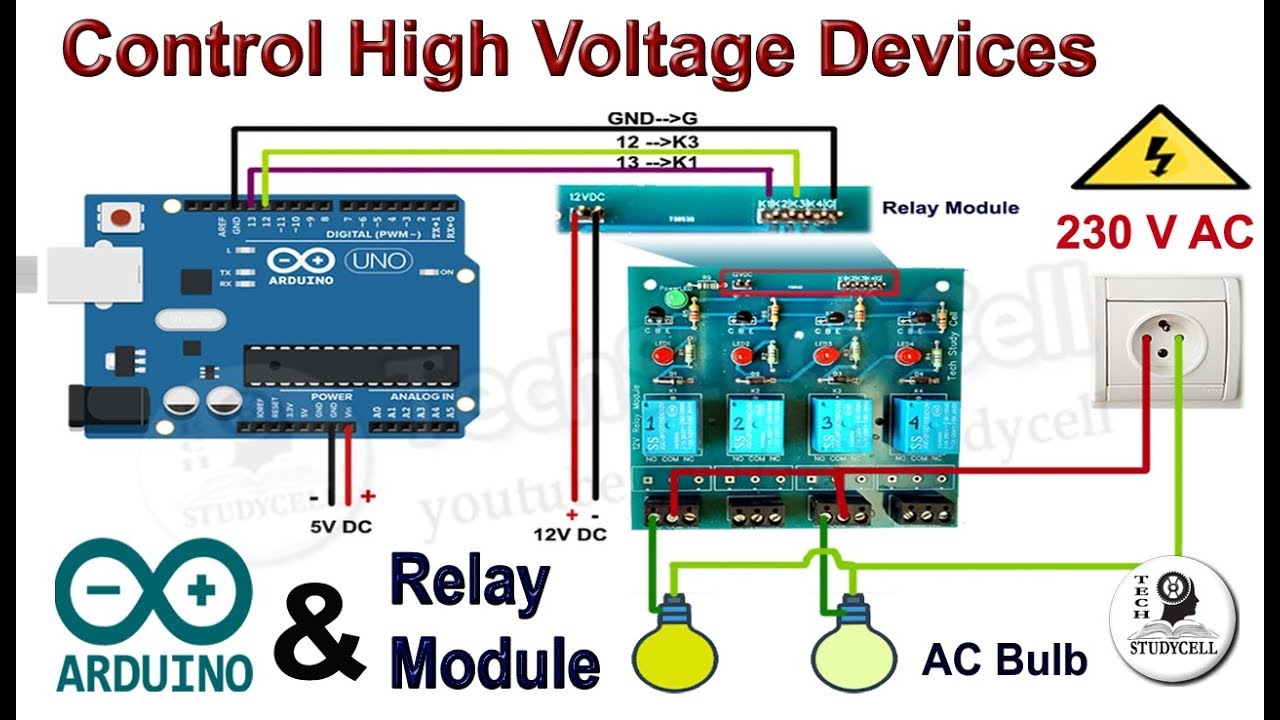
This instructable is for connecting your arduino to a 2 channel relay module and using your sketch to control the switchesi bought the 2 relay module on ebay for 950 to drive a couple of 240v parts a vacuum cleaner and a rotary engraving too. The connections between the relay module and the arduino are really simple.
5 Volt 4 Channel Arduino Relay Module Example Arduino Learning
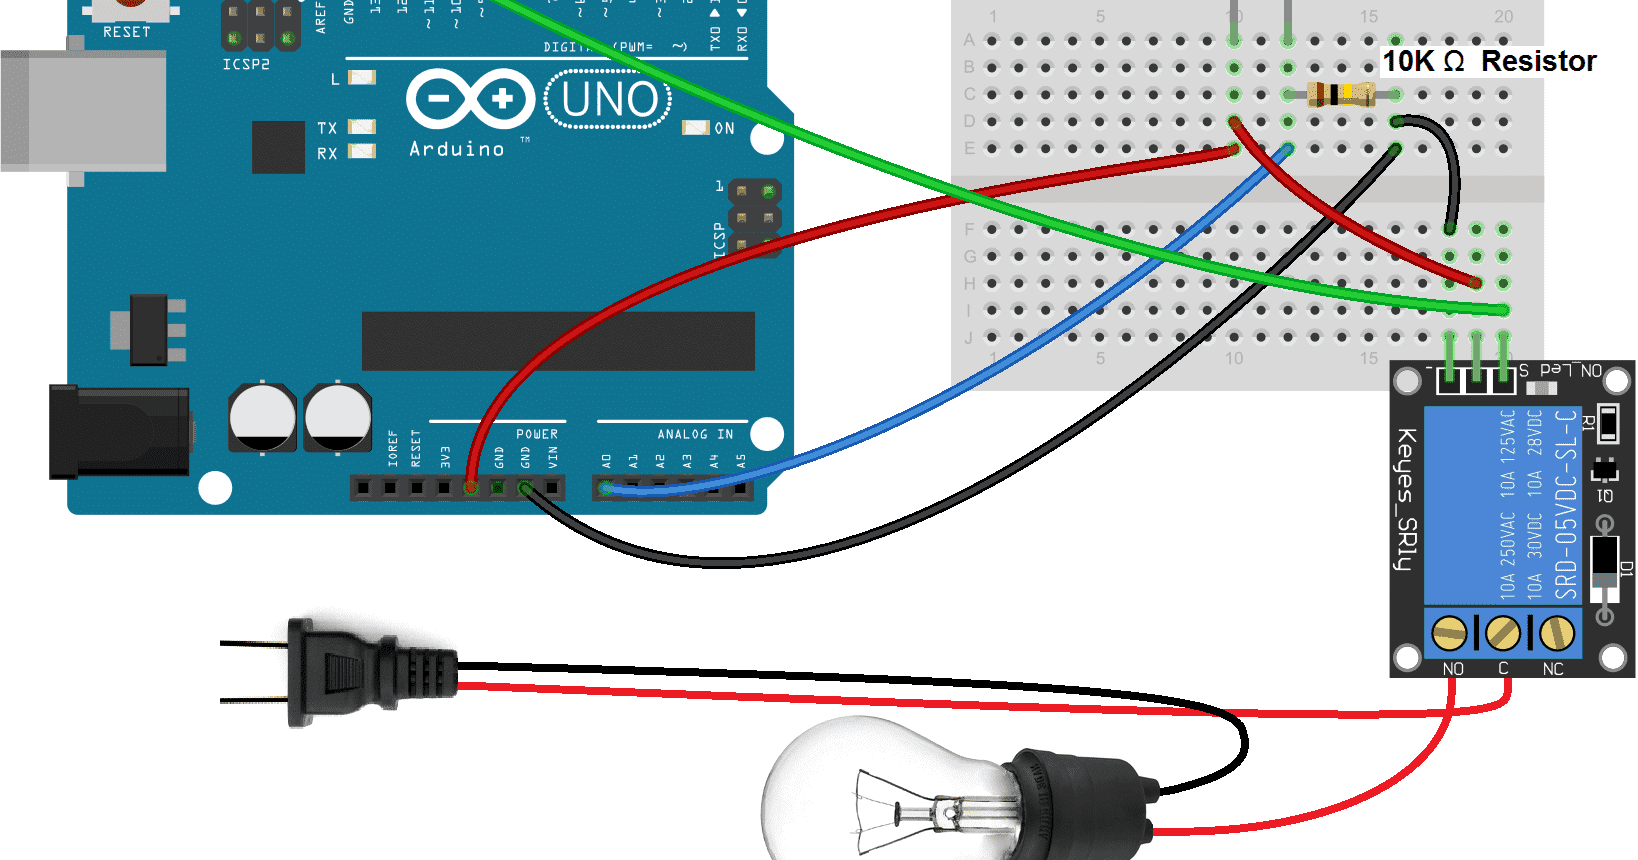
Arduino relay wiring diagram. Connect the side leading to the light bulb to the no terminal of the relay and the side leading to the plug to the c terminal. Arduino 2 channel relay. In the above wiring diagram we have kept the jumper in place due to which the electromagnet of the relay will be driven directly from the arduino. Nonormally open ccommon ncnormally closed. A relay accomplishes this by using the 5v outputted from an arduino pin to energize the electromagnet which in turn closes an internal physical switch to turn on or off a higher power circuit. In this video ill be showing you the circuit diagram and code for my previous autonomous sanitizer dispenser video.
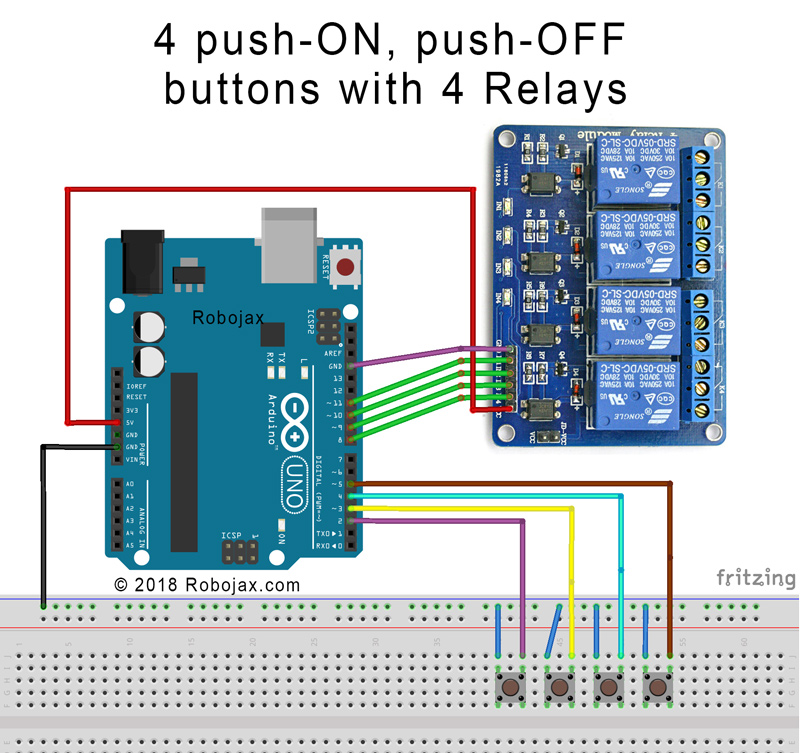
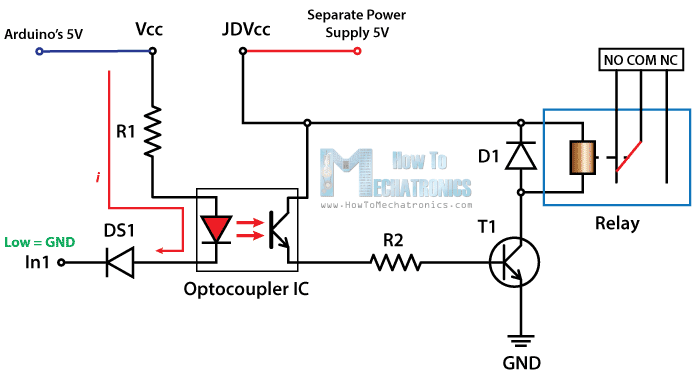
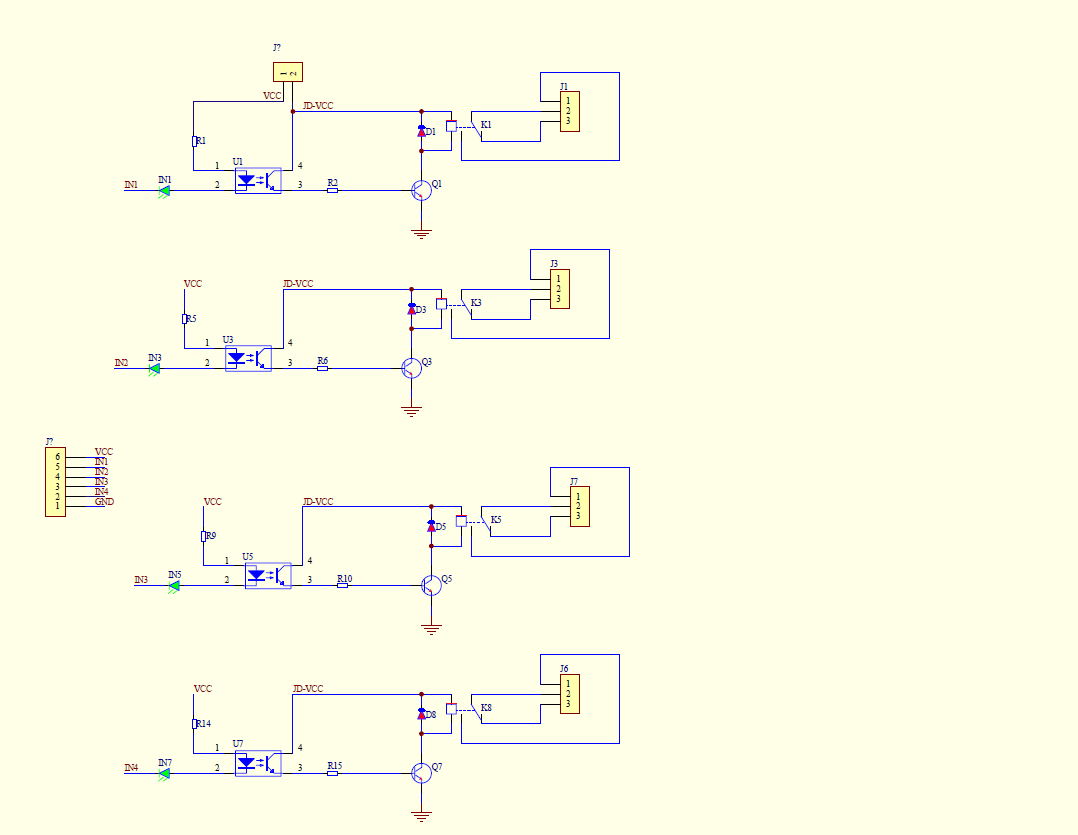
Controls the second relay it should be connected to an arduino digital pin if you are using this second relay. Learn how to use button to control relay button triggers light. The 5v relay means that the relays are activated by 5v which is what most arduinos run on. Four 5 volt dc relay. The detail instruction video tutorial line by line code explanation are provided to help you quickly get started with arduino. In this case the relay module and the arduino will not be physically isolated from each other.
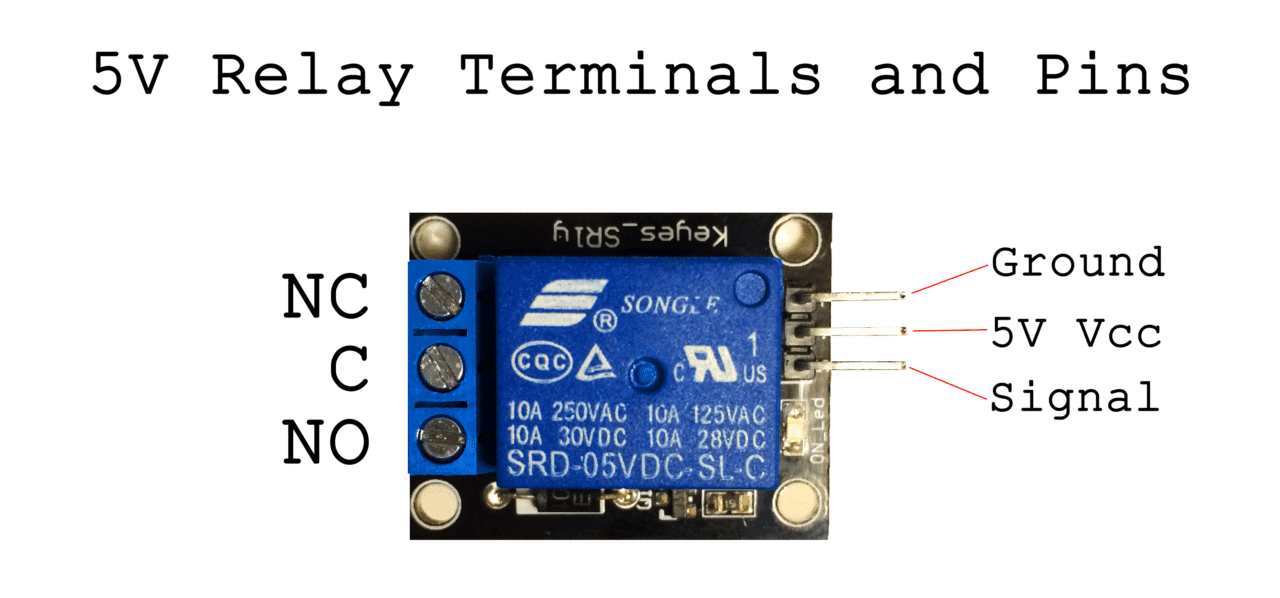
I will describe the circuit for one really really have five legs 1 for nc normally closed 1 for no normally open and a common and two legs for 5 volt dc supply so whenever you will five volt input in these two legs the relay will be activated. Identify the hot power wire red wire in the diagram above in the cord leading to the light bulb and make a cut. Otherwise you dont need to connect it. Make sure you watch till the end and click the like subscribe. It is used to programmatically control onoff the devices which use the high voltage andor high current. A relay is a programmable electrical switch which can be controlled by arduino or any micro controller.
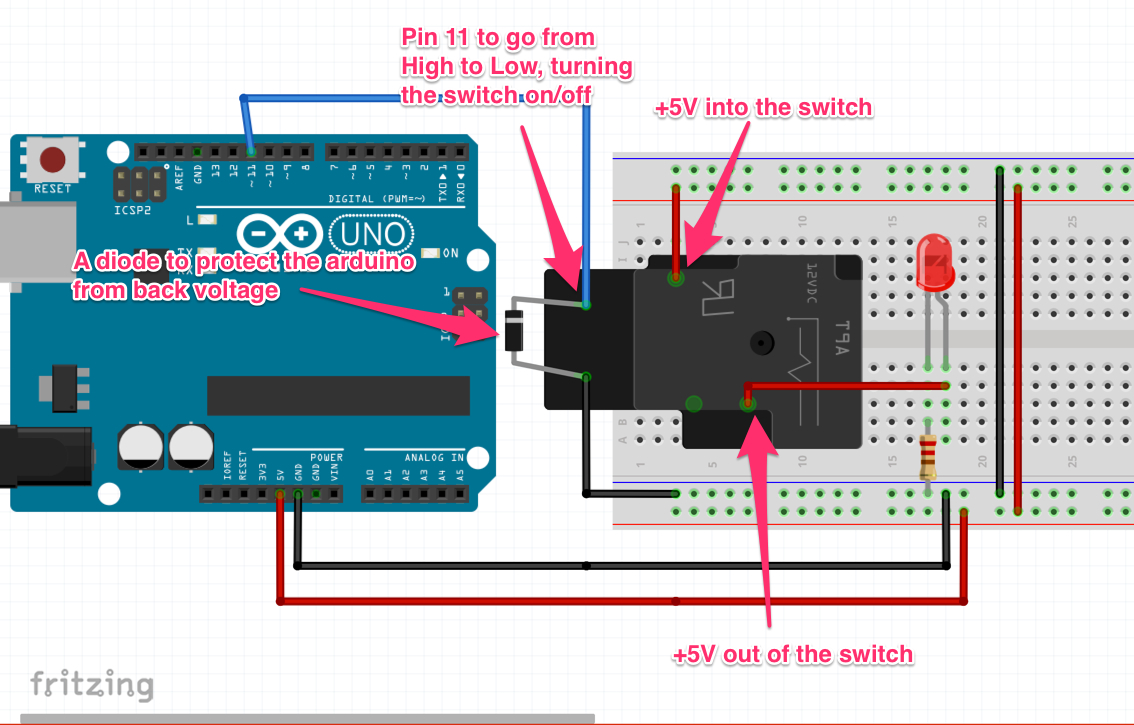
Hooking the wires up to the arduino relay board. The switching contacts of a relay are completely isolated from the coil and hence from the arduino. Ive labeled the relay connections to make it easier to follow. Basic parts for wiring up arduino. The only link is by the magnetic field. Take a wire and cut a small section off for a pigtail.
Controls the first relay it will be connected to an arduino digital pin in2. This way the relay is on the hot side and current is switched before it reaches the light bulb.
Gallery of Arduino Relay Wiring Diagram