It is compatible with the original prusa i3 mk3s and mini. To know where it can print you need to home the printer.

Prusa Mk3 Mean Well Power Supply Psu Upgrade Housing By
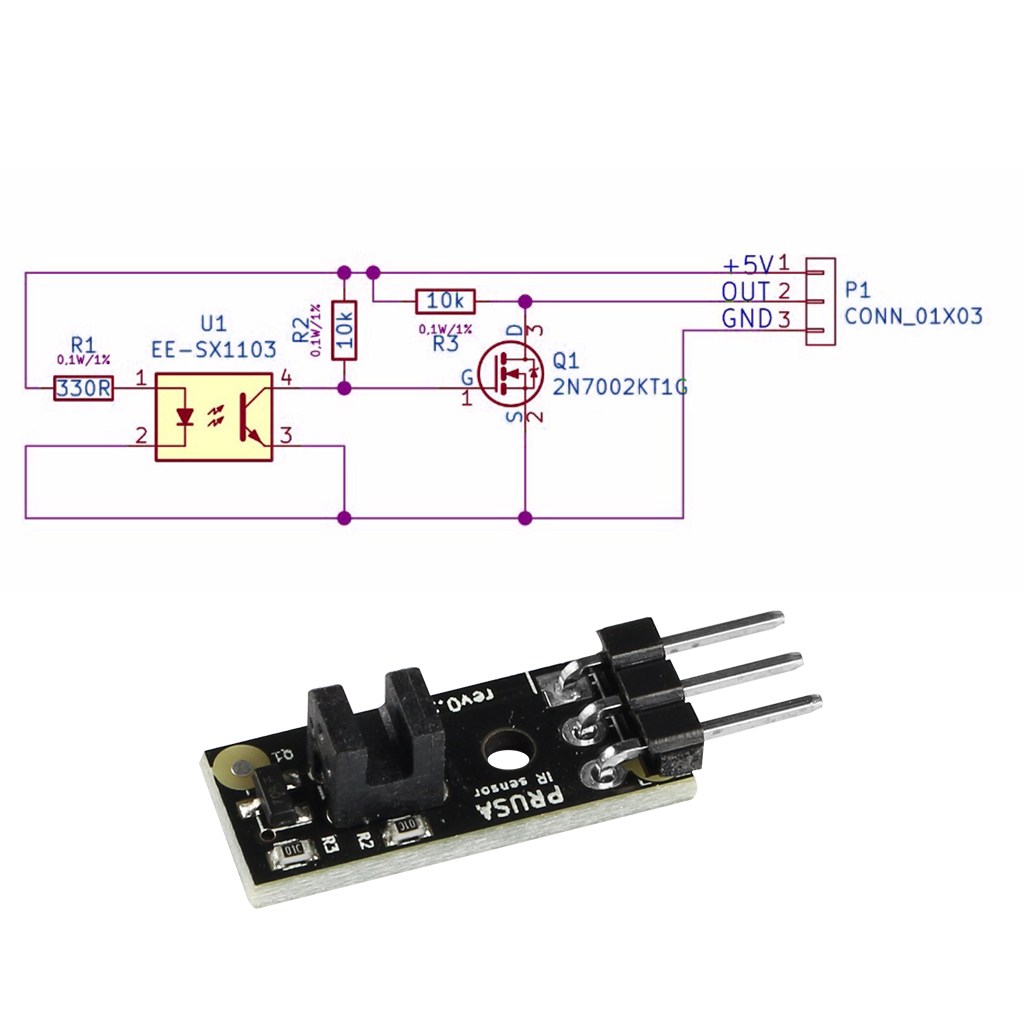
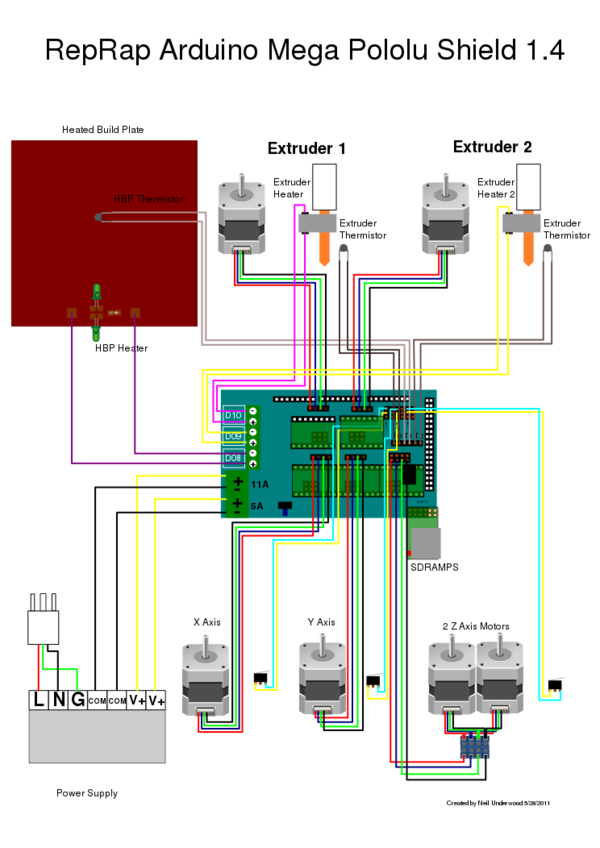
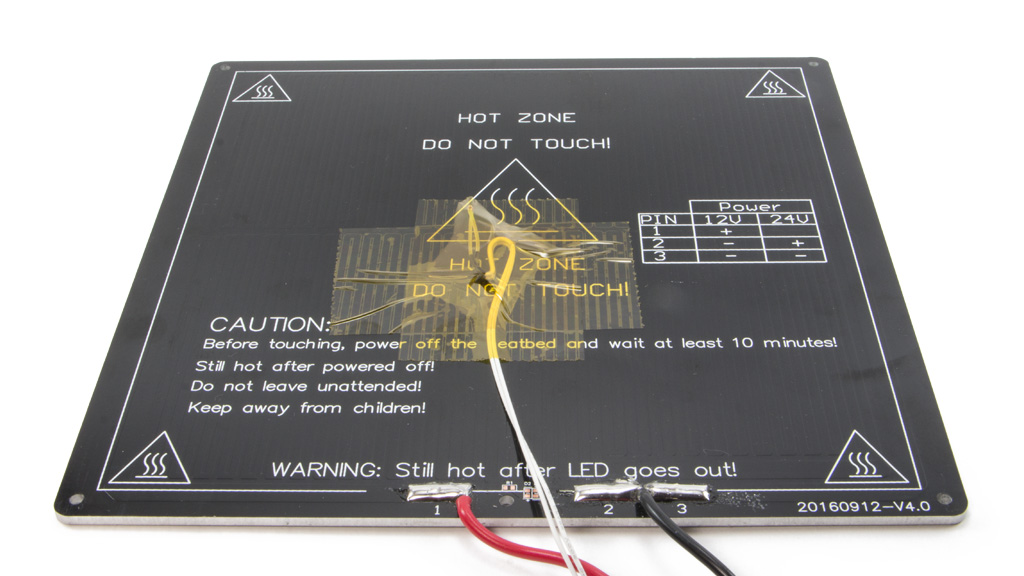
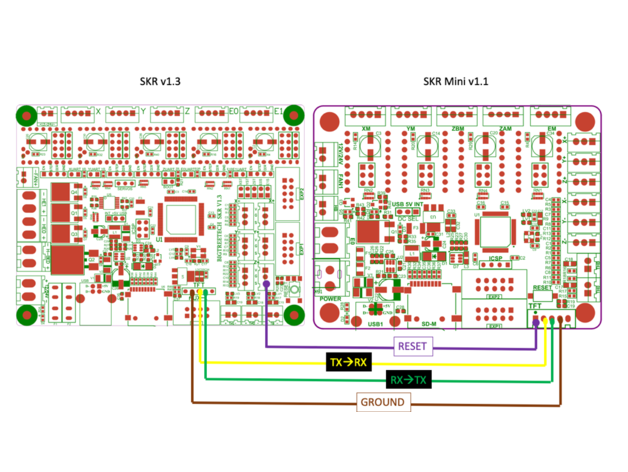
Prusa mk3 wiring diagram. Slide the other onto two others. Prusa i3 printer assembly. 4x m4x10mm flat screws mount psu to bracket 2 needed 4x m3 square nuts 3x bottom 1x housing 1x m4x10mm button screw mount psu to mk3 frame 4x m3x6mm flat screwsmount bottom to. To home the printer we need to use end stops mechanical or optical switches that are tripped when the movement of the axis reach their maximum or minimum the switch signals the arduino and the. I stumbled across the new heat bed wiring updates on the prusa web site. So thought i would give them a try.
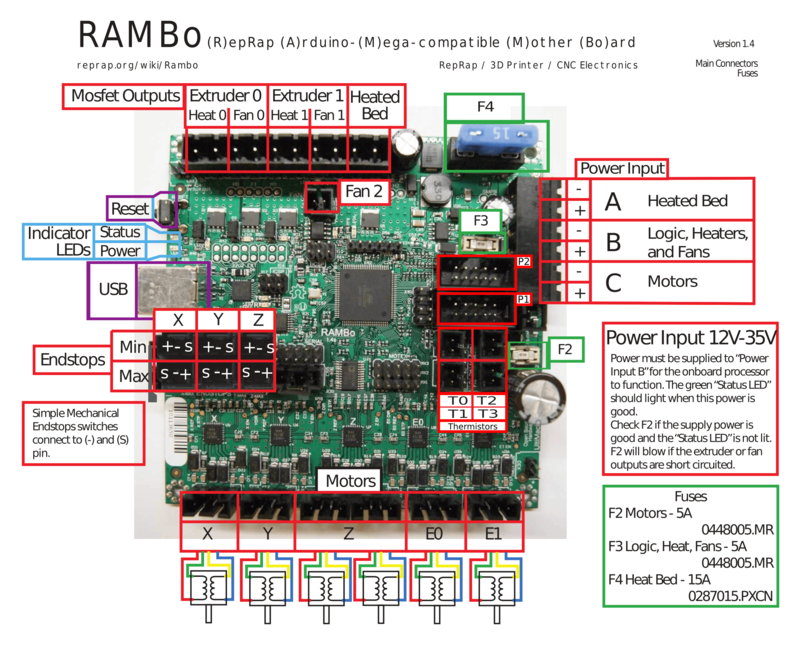
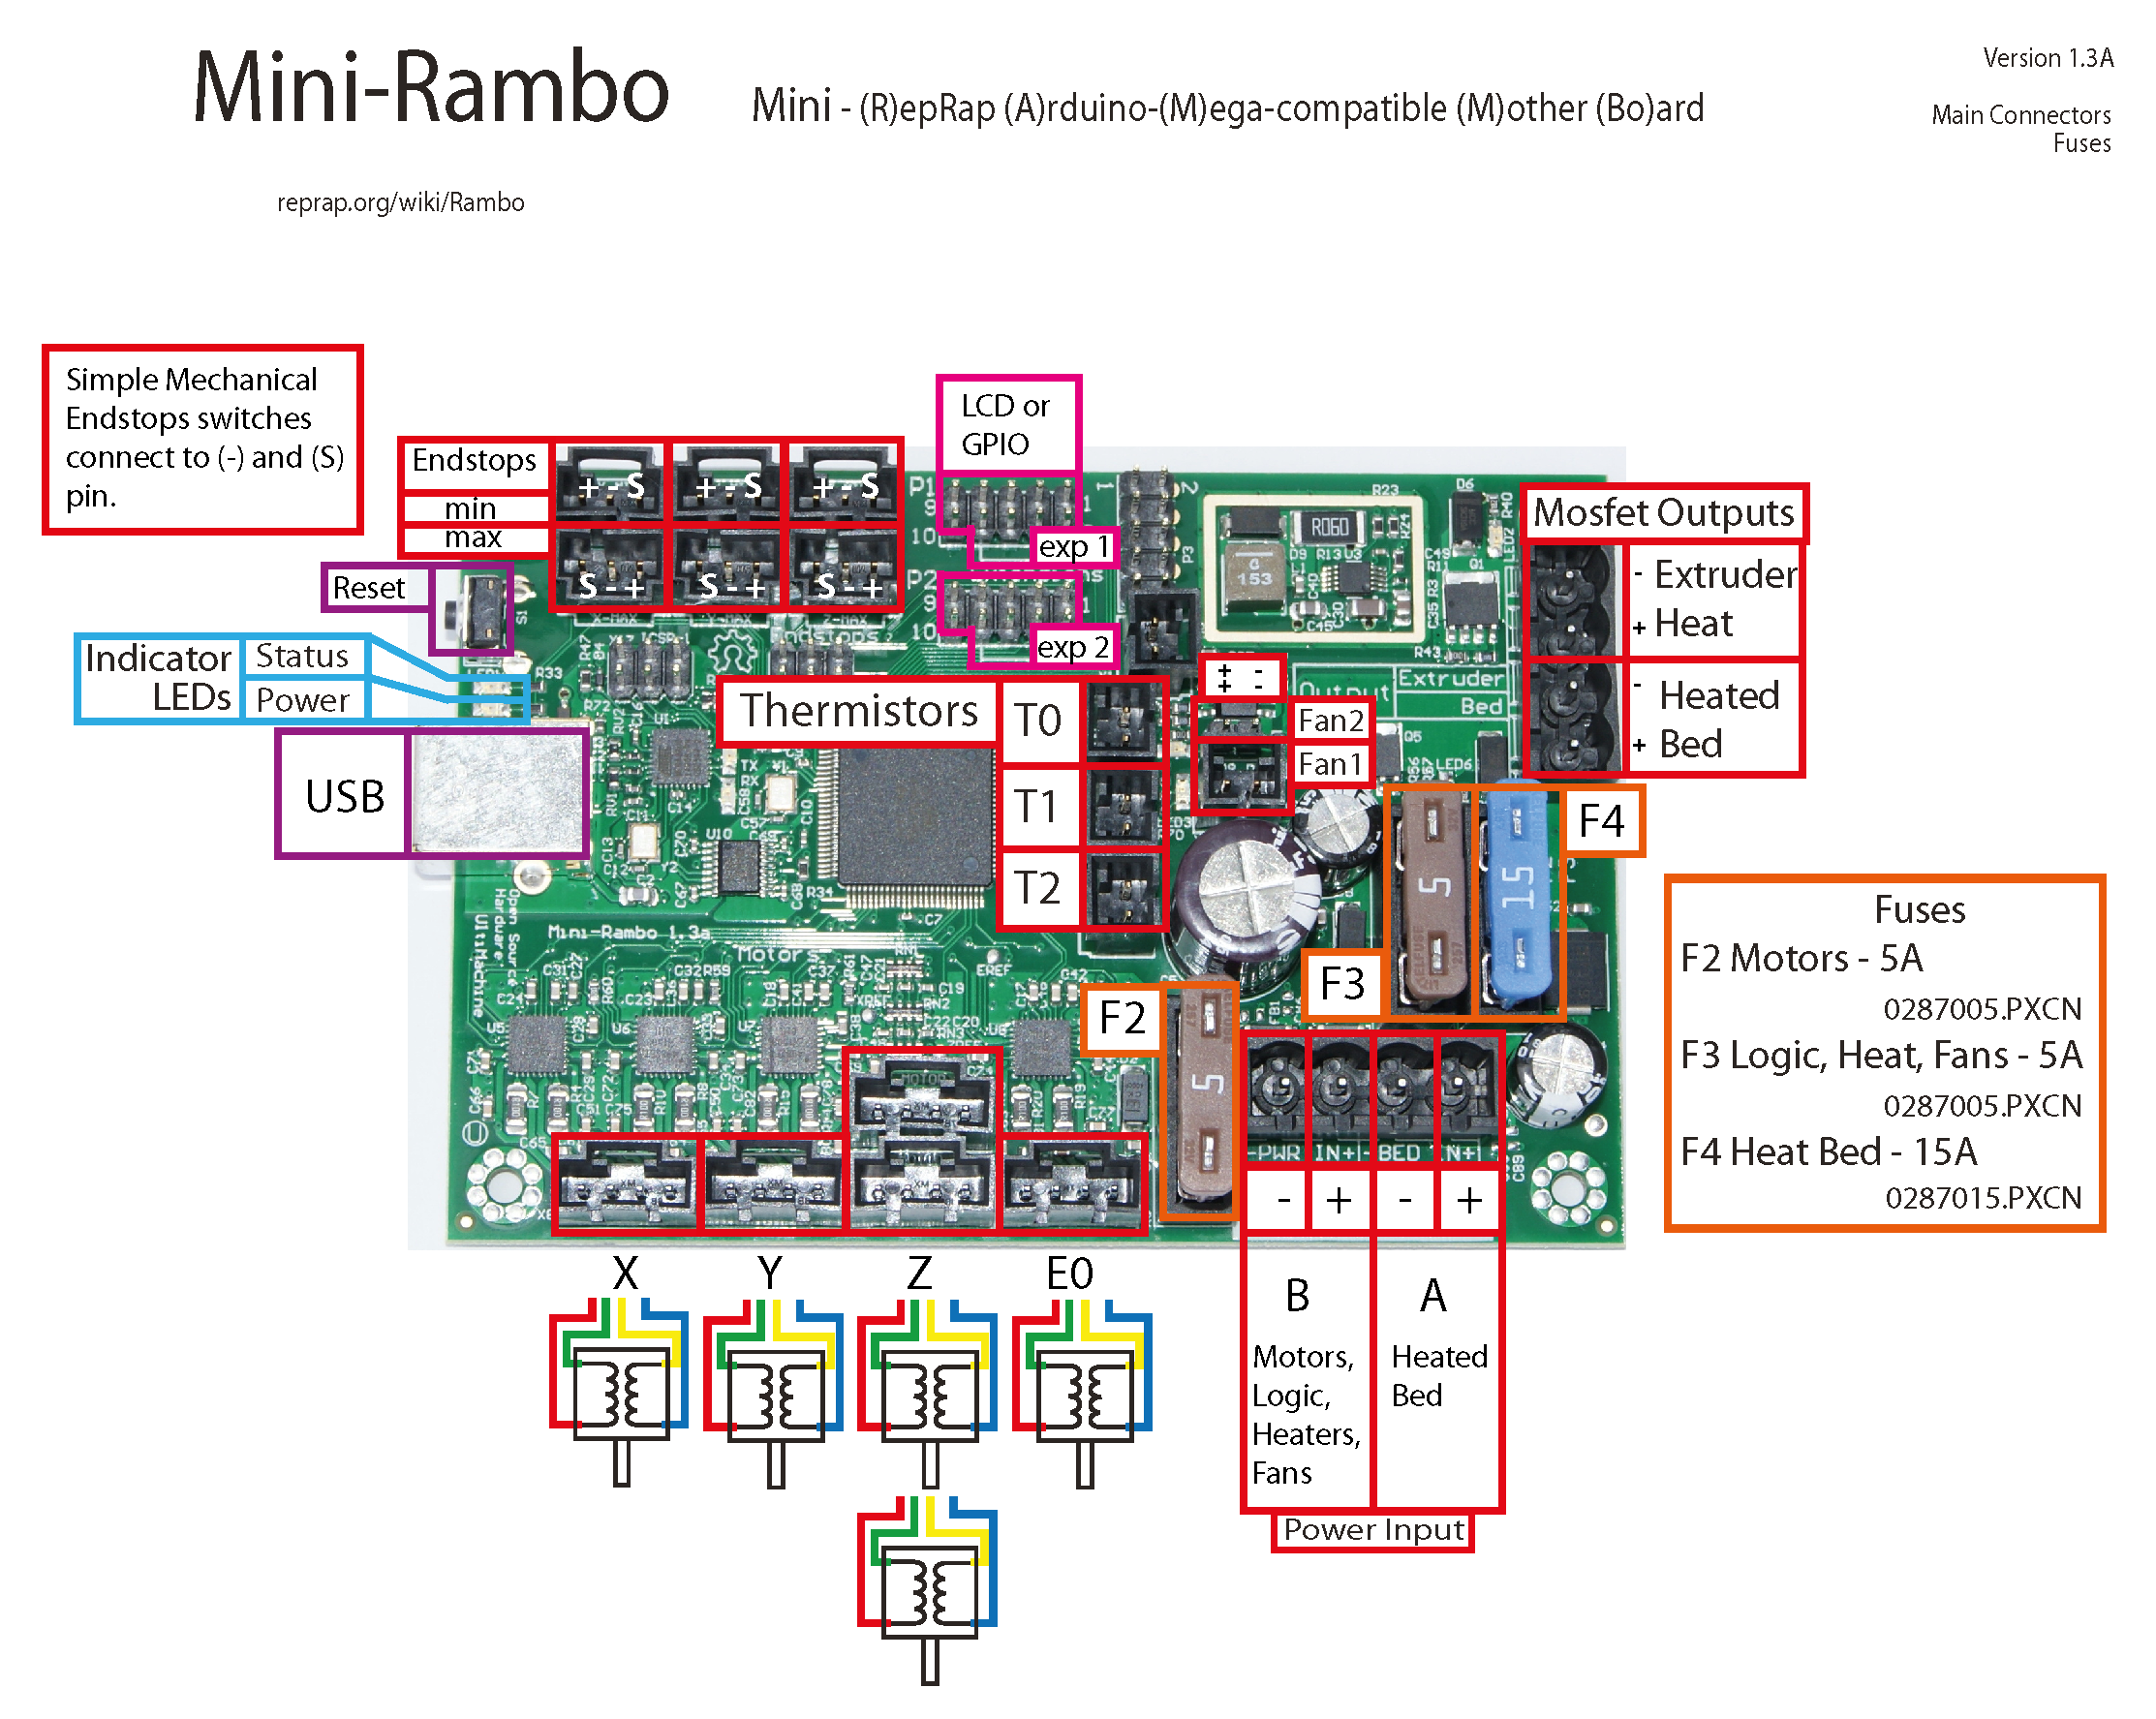
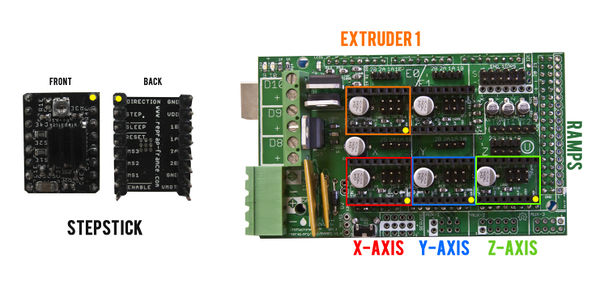
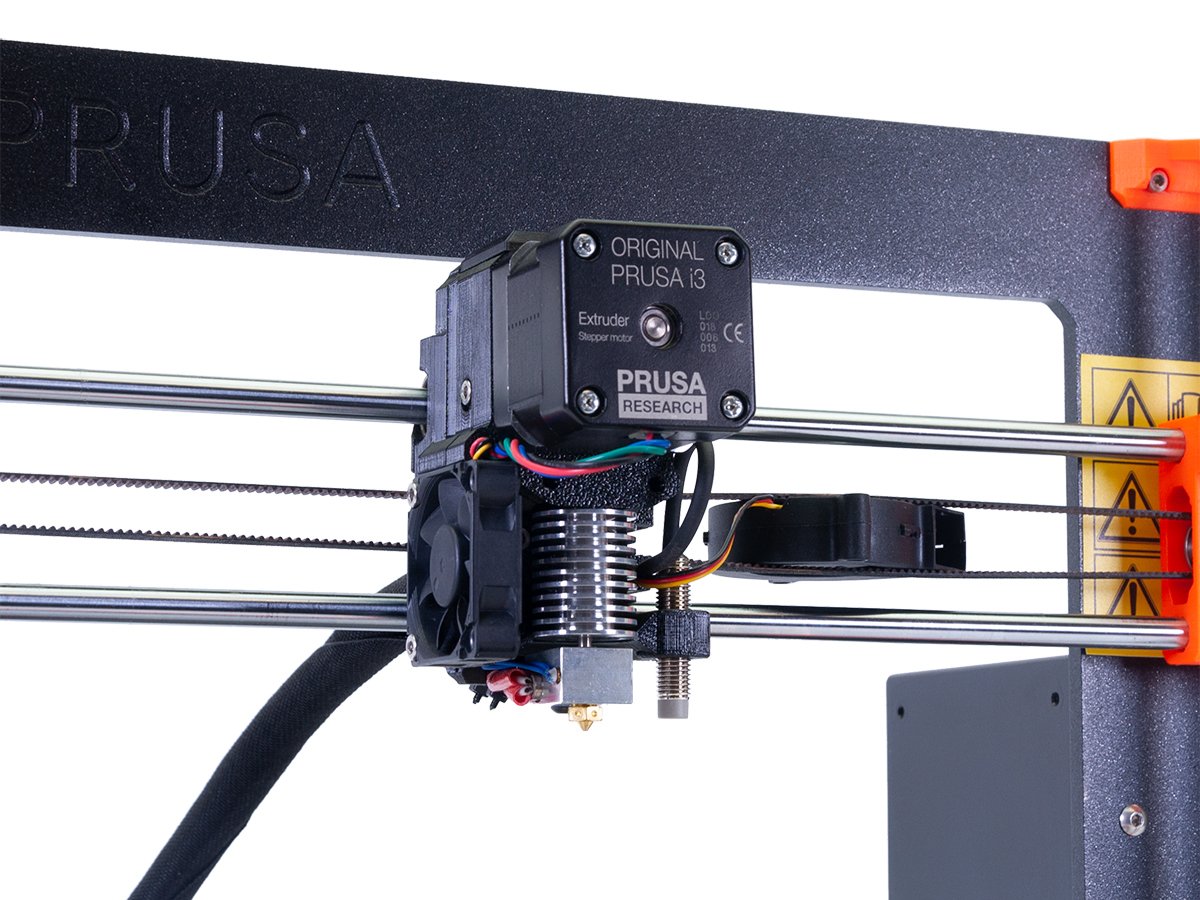
Written as mini rambo mini rambo or rambo mini the logic board used in the original prusa mk2 series is very simple. 2020 prusa research as. Y motor bracket slide one onto the one of the m8 rods. Spare parts production is limited due to the covid 19 please note the lead time can reach up to 2 weeks before shipping. Magazine where mk3s also received editors choice as the highest rated 3d printer in 2019 digital fabrication guidethe mk3s features a rebuilt extruder numerous sensors and various smart featuresplus a new magnetic mk52 heatbed with replaceable pei spring steel print sheet. The prusa i3 printer has a build size of approximately 200mmx200mmx200mm 8x8x8.
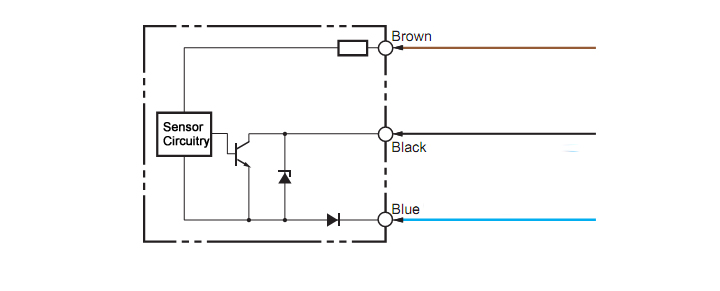
Please refer to the image below regarding wire colors and correct connector orientation. Y idler bracket. Use the diagram for orientation. This bracket is specifically designed to upgrade a prusa mk3 printers stock power supply psu to a mean well nes 350 24. Add to wishlist. Y axis short rods locate your.
Additionally it moves the ac outlet to the back of the printer. Add to cart more. If you are getting selftest errors or if you are encountering any issues related to the electronics motors not moving wrong hellip.
Gallery of Prusa Mk3 Wiring Diagram